At AdaptivEdge, we believe that security should be a part of every conversation, consultation, and solution we deliver. Our Security and Compliance experts have developed step-by-step instructions on how you can enhance the security of your Office 365 deployment.
Authored by Steve Andrews (Director Cloud Platform Services) & Raul Perez (Senior Microsoft Systems Engineer)
At AdaptivEdge, we believe that security should be a part of every conversation, consultation, and solution we deliver. Our Security and Compliance experts have developed step-by-step instructions on how you can enhance the security of your Office 365 deployment. Here are the top 4 security settings you should address right away:
MULTI-FACTOR AUTHENTICATION | BEST PRACTICE #1:
Enable multi-factor authentication (MFA) for your Office 365 administrator accounts (global admins or security admins).
MFA, also known as two-step verification, is designed to protect against account and email compromise. When logging into Office 365 and other related applications, users will be required to enter their password and perform another verification step. This could be entering a code sent to your mobile phone, answering a phone call, or using the Microsoft Authenticator mobile app to authorize the login request.
Due to the nature of security risks associated with simple, unencrypted SMS protocol text messages, AdaptivEdge highly recommends that you use the Microsoft Authenticator App as the primary method of MFA for all administrators. SMS text message or voice should be set up as a secondary method to be used in the event of a lockout or issue with your mobile device.
- Here are the steps and considerations to do this:
- Communication is essential here. Reach out to your team of admins and let them know they are being enabled for MFA, what the timeline is, and what to expect when it is first activated. They also should download the Microsoft Authenticator app on their phones beforehand, so they are ready. Then answer any questions that arise before go-live, and check in with reminders, training, and tips leading up to that date. (Deploying MFA to your Office 365 admin accounts will help prepare you to deploy MFA to your user base (highly recommended).)
- Set up a test account to validate the following steps. Run through these steps with that account first then, when satisfied, run through them a second time with your administrators.
- Go to this URL and select “Enable” to turn on MFA for the administrators of your Office 365 tenant: https://account.activedirectory.windowsazure.com/UserManagement/MultifactorVerification.aspx
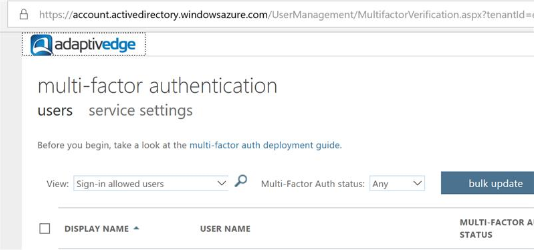
Note that "service settings" is clickable and will allow you to manage your global settings for MFA.
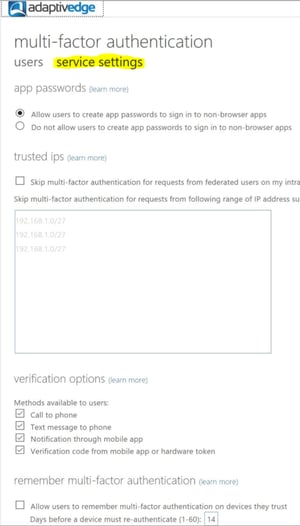
- "Verification options” are important here. As we mentioned earlier, the primary method should be the Microsoft Authenticator app. You can select “Notification through mobile app” – this will prompt “Approve or Deny” when a login request is made. “Verification code from mobile app or hardware token” generates a rotating code that will be prompted for entry on the login screen. In case the administrator’s phone is broken or having issues, select “Call to phone” and make sure a secondary phone number is entered by the admins. When this method is selected Microsoft will “robo-dial” that second stored number and prompt the admin to accept or deny the login.
The other settings in the section are up to you to change by experimenting with your test account user. -
Once you have set up MFA, have your admins complete the following steps:
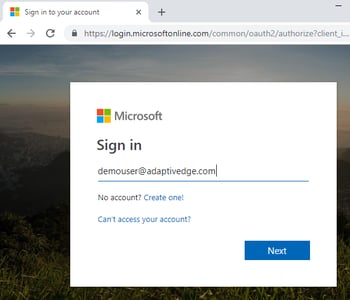
- Open your browser and go to https://portal.office.com
- Enter your admin user name (email address) and password.
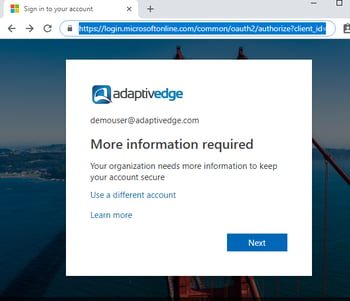
- Once you’ve entered your password, you’ll get prompted that “More information is required to keep the account secure.” Click NEXT to initiate the enrollment process.
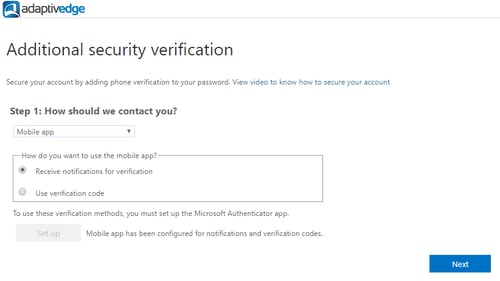
- From the dropdown menu select “Mobile App” as the method to be contacted. Enable the radio button to “Receive notifications for verification” (or Use verification code method if you chose that as an option earlier) click “Set Up” button to proceed.
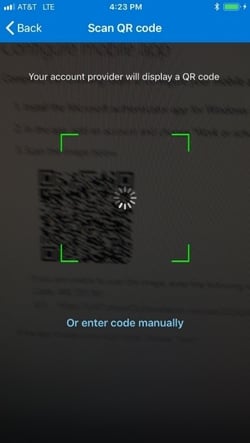
- The next screen will display instructions along with a QR code that will be used to set up the app.
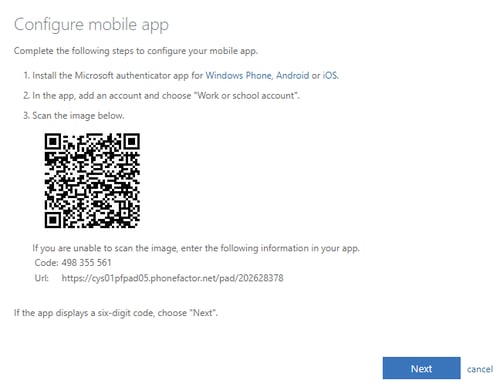
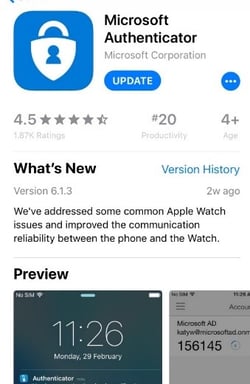
- The Microsoft Authenticator app is available for iPhone, Android and Windows Phone. It is also compatible with some wearable technology such as Apple Watch. If you haven't already, please download for your device. (Note: these steps reference screenshots for iPhone)
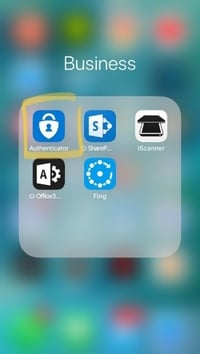
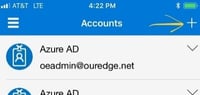
- After completing the installation proceed to launch the app and click on the + icon to begin adding a new account if not automatically prompted.
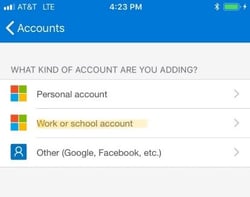
- Select the option to add a “Work or school account”
- Now scan the QR Code on the screen with the phone to complete the setup. If the scanning feature does not work, you can manually enter the activation code that is displayed on the web browser.
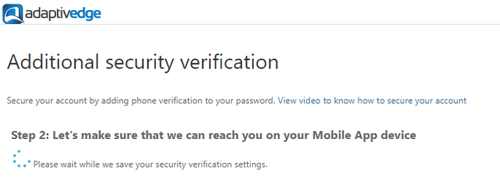
- The web browser will update and display a notification that your device is being contacted.
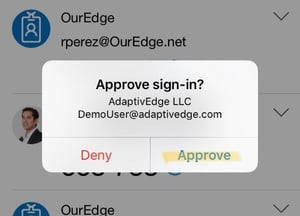
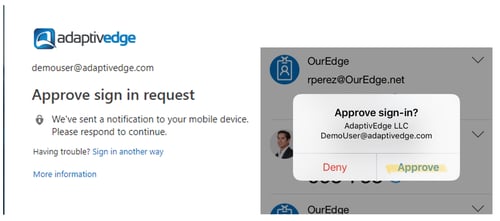
- Your device will now display a prompt to approve sign in. Note: This prompt will be the method of approving sign in going forward.
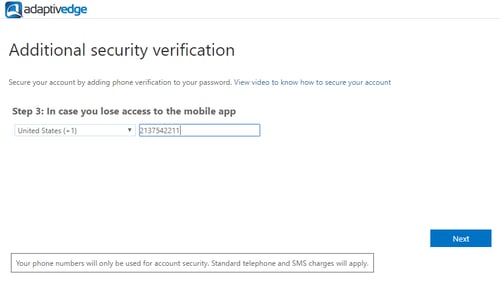
- Enter another phone number as a secondary method to receive a voice call for authorization in the event of an issue with your mobile phone and click next.
- When completing the setup, an “app password” will be displayed. Save this password as it will be required for programs such as Outlook, Skype for Business and OneNote. When prompted for your login and password on these programs, use this app password instead of your usual password. Here is a good reference on this https://support.microsoft.com/en-us/help/12409/microsoft-account-app-passwords-and-two-step-verification
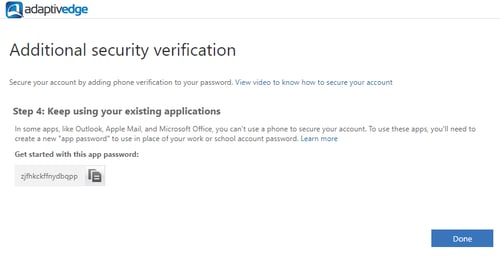
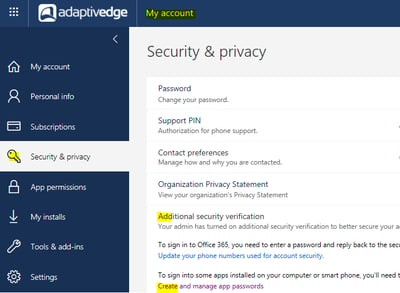
- The application passwords can be created and managed from the Office 365 portal by navigating to: My Account > Security & Privacy > Additional security verification > Create and manage app passwords:
- Once the setup is complete, administrators will receive a notification on your mobile device to approve sign-in when logging into the portal and accessing cloud resources. If you receive this prompt and are not trying to sign in, your account has been compromised. Change your password immediately.
DEDICATED ADMINISTRATOR ACCOUNTS | BEST PRACTICE #2:
Create dedicated administrator accounts – do not add the global admin role to existing user accounts.
Administrators would log in using their administrator account credentials for performing administrative actions. The naming convention for these admin accounts is up to you. Consider something that’s unique to your organization. For example, an unusual convention such as sandrews_kng@adaptivedge.com would be more secure than sandrews_adm@adaptivedge.com.
MAILBOX AUDIT LOGGING | BEST PRACTICE #3:
Enable mailbox audit logging and review the logs in the Office 365 Security & Compliance Center.
Mailbox audit logging is not automatically enabled in Office 365. After you enable it you can search the audit log for mailbox activity, which you should do on a regular basis. (Note that mailbox audit logging is enabled by Exchange Online PowerShell and cannot be enabled on mailboxes that are part of an Office 365 group or a team in Microsoft Teams.)
Here are the steps:
- Open Windows PowerShell and enter the following command:
- $UserCredential = Get-Credential
- This pops up the credential request box, log in with an Admin (global admin role) account.
- Now enter the next command:
- $Session = New-PSSession -ConfigurationName Microsoft.Exchange -ConnectionUri https://outlook.office365.com/powershell-liveid/ -Credential $UserCredential -Authentication Basic -AllowRedirection
- And the next command:
- Import-PSSession $Session
- To make sure you are connected to the right Exchange Online organization enter this and it will show you a list of all the mailboxes in your organization:
- Get-Mailbox
- Now we’ll enable the mailbox logging, you can first test by enabling for a single mailbox (here my example is for Demo Dave mailbox):
- Set-Mailbox -Identity "Demo Dave" -AuditEnabled $true
- To enable for all mailboxes in your organization you can run:
- Get-Mailbox -ResultSize Unlimited -Filter {RecipientTypeDetails -eq "UserMailbox"} | Set-Mailbox -AuditEnabled $true
- You can then specify the actions the owner does and track them, some are audited by default. Here is the table with all actions listed and which ones are audited by default.
- To audit Demo Dave’s mailbox for MailboxLogin and HardDelete:
- Set-Mailbox "Demo Dave" -AuditOwner @{Add="MailboxLogin","HardDelete"}
- To confirm you have set mailbox audit logging:
- For a single mailbox, Demo Dave:
- Get-Mailbox "Demo Dave"| FL Audit*
- For all the users in your organization:
- Get-Mailbox -ResultSize Unlimited -Filter {RecipientTypeDetails -eq "UserMailbox"} | FL Name,Audit*
- The value of True in the AuditEnabled property shows it is active.
- For a single mailbox, Demo Dave:
- To audit Demo Dave’s mailbox for MailboxLogin and HardDelete:
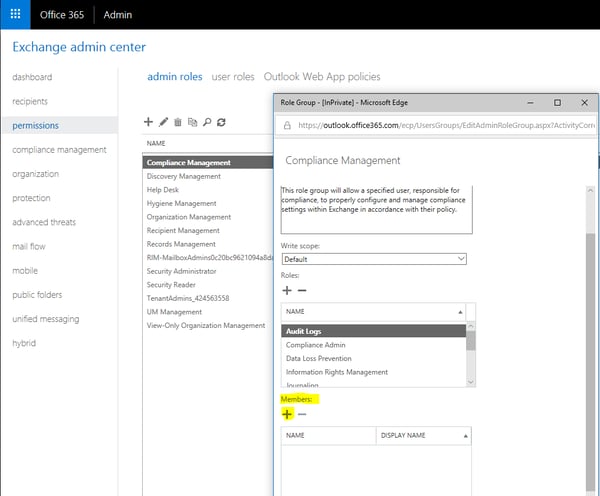
To review the audit logs, you will need to be assigned either the View-Only Audit Logs or Audit Logs role in Exchange Online. If you don’t already have the Compliance Management and Organizational Management role groups on your account, you’ll need to add them. It needs to be added in Exchange Online administration, not the permissions page in the Security & Compliance Center:
- As a global admin log into https://portal.office.com
- Click on Admin Icon in the Apps pane
- In the admin center go to Exchange Admin
- Select Admin roles under Permissions section
- Double-click or edit Compliance Manager (or the other) role
- In the Members section add your admin account so you can review the audit logs
Now we can access and review the audit logs, note: E3 license audit records are held for 90 days, and E5 for one year:
- Log on to https://protection.office.com (it’s a good idea to use a private browsing/incognito session so it does not log in as your current regular user login, and you can enter your admin credentials)
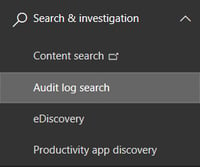
- Click on Search & Investigation in the left menu then Audit Log Search
- The Audit log search box is displayed:
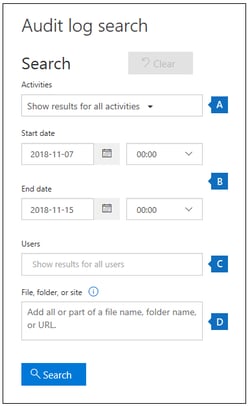
- Under Search in the Activities box here are the Exchange mailbox activities you can review:

- Up to 5000 results are returned in the viewer, more if you export to CSV file.
- More detail is shown if you click on the event in the viewer to drill down.
- Familiarize yourself with doing these searches and filtering the results.
- Schedule a weekly review.
- Automated Alerts can also be configured in the same console, here the default Elevation of Exchange Admin Privilege can be examined as a template:
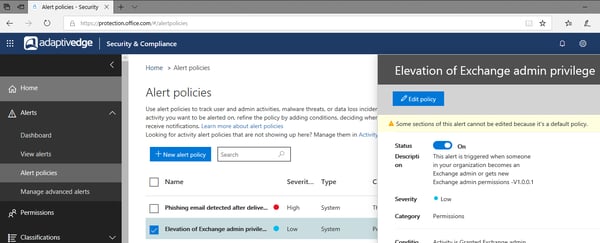
- This is in the Alerts section of the console in Alert Properties.
- When the alert properties are met an email is sent to the tenant admins:

MALWARE DETECTION SETTINGS | BEST PRACTICE #4:
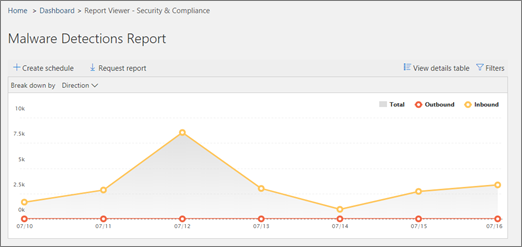
Review weekly Malware Detection's report.
It is imperative as a weekly routine to go over the Malware Detection's report – it helps you understand how much malware is being targeted at your organization’s users. The report arms you with the right information as to whether more aggressive tactics are required to mitigate malware attacks. You can create a schedule for this report to be sent to your mailbox.
A great variety of email security reports are gathered together in your Security & Compliance Center, https://protection.office.com. Before you can access these reports, your user account must have a role from both the
Security & Compliance Center and Exchange Online.
- Security & Compliance Center: one of these roles must be added:
- Organization Management
- Security Administrator
- Security Reader
- Exchange Online: one of these roles must be added
- Organization Management
- View-only Organization Management
- View-only Recipients role
- Compliance Management
Steps for Security & Compliance role adding:
- As a global administrator log into https://protection.office.com
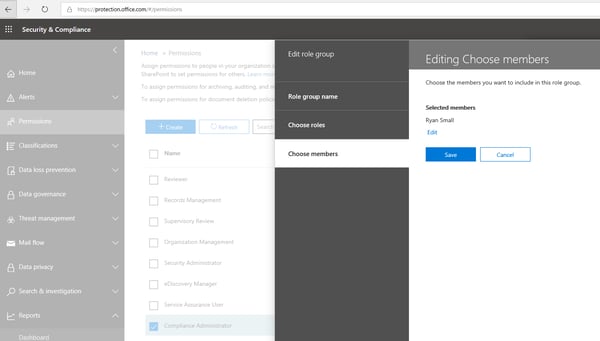
- Click on Permissions on the left navigation
- Select one of the roles needed
- Click Edit role group
- Choose members and add the account you will use to access the reports
- Click Done
- Click Save
Steps for Exchange Online role adding:
- As an administrator log into https://portal.office.com
- Click on Admin Icon in the Apps pane
- In the admin center go to Exchange Admin
- Select Admin roles under Permissions section
- Double-click or edit Compliance Manager (or the other) role
- In the Choose Members section add your account that you will use so you can review the audit logs
- Click Add
- Click Done
- Click Save
- Now you can access the Malware Detections report – in https://protection.office.com go to Reports in the left navigation and Dashboard
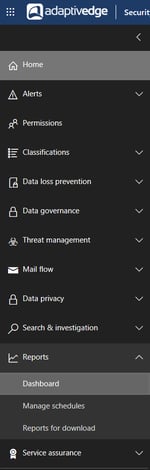
- Click on Malware Detection's Report to expand:
- Click on the Top Malware Report to review:
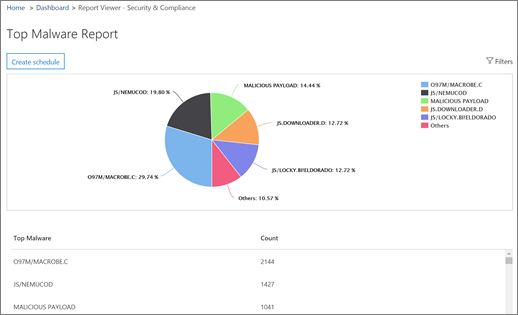
Hovering over slices of the chart in the report show detail of the type of malware and how many messages were detected containing it. Details are also listed below. In these example reports, there is a lot of malware activity, so a more aggressive stance would be advised to reduce it.
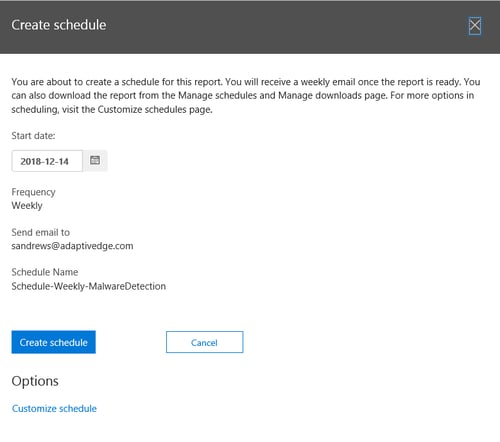
- Finally, you can automate generation of the report and delivery to your mailbox:
- On the top left of the Malware Detections Report click Create Schedule:
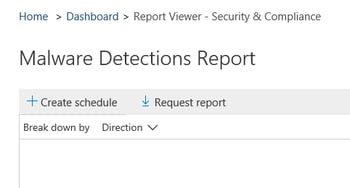
- In the Create schedule options click Create schedule (default is weekly, which is recommended) and verify it will go to your mailbox: